Friday 30 September 2016

Tree Tag for Stampendous


This week at Stampendous we are playing with the Stack stamp sets - these are really cute sets where the heads and bodies mix and match so you can create different characters. The set I used is called Winter Stack and features lots of cute snowmen.

I chose to make an MDF tag to hang from the Christmas tree using Fran-tage to create a lovely textured background.

Here's how:
1) Undercoat the tag with gesso then cover generously with Versamark. Cover with Spoonful of Snow and gently heat set (hold the heat tool at a distance to begin with to prevent the powders blowing away).

2) Add more Versamark and some Chunky White powder to the bottom, while still hot sprinkle in some Ice Blue enamel and heat again. Again while hot, add some flakes of white mica for extra texture.


3) Emboss a snowflake (Tando Creative) with Ice Blue enamel and add a sprinkle of Crystal Mix Glitter while the enamel is still hot.

4) Finally colour the stamped image and use wet glue to add some Crystal Mix Glitter to his hat and the snow at his feet. Use hot glue to secure him to the lumpy bumpy background.


He would look cute on the Christmas tree wouldn't he? And with the mix and match elements of the Winter Stack you could make a whole set with a different snowman on each.

Warm wishes!
Katy x

Stampendous products used:
Winter Stack Clear Stamp Set (SSC1249)
Fran-tage Embossing Enamel - Ice Blue, Chunky White
Fran-tage Spoonful of Snow
Fran-tage Mica Fragments - White
Crystal Mix Glitter
Versamark Inkpad

Winter Stack set


Friday 23 September 2016

Death Becomes Her for Paperbabe Stamps


Well how lucky am I getting to play with the brand new releases from Paperbabe stamps (click the link to go to the Paperbabe blog for more inspiration)! 

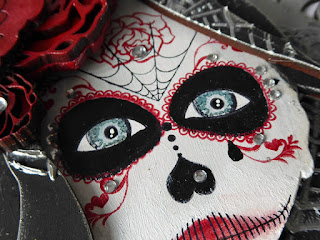
As soon as Kim showed me the Day of the Dead inspired face stamps I HAD to say yes to creating a piece for her. I am no artist so rather than try to create realistic hair and skin I decided to go a bit Gothic and make a piece of Halloween art. I've been very much inspired by Kim's work with her substrates and stamps for this piece so I can't really take much credit - but it does show how easy it is to learn from her and create your own artworks even if you can't draw for toffee!

I combined the Mini Female Face set and the new Sugar Skull set to construct the face. I stuck to a white, black and red palette, using shades of grey for the eyes.

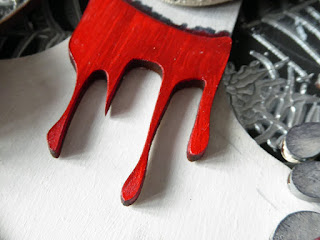
Because I love a bit of the macabre I used the blood drips around her neck and painted a 'slash' line with red and grey paints above.

The layered flowers are painted in two tones of red and finished with gems.

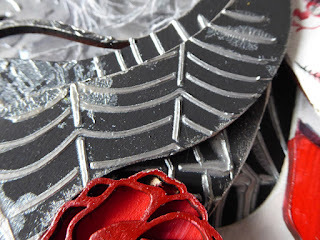
I painted the large MDF panel silver then used the new Roses stencil with silver embossing paste (Dreamweaver) over the top. I aged the silver with black Archival Ink applied with a sponge. Scraps of grey netting add to the aged effect.

Her hair is simply painted black then stencilled with cobwebs in silver embossing paste.


Hope you like my spooky portrait. I had a ton of fun making it! Pop over to the Paperbabe blog for more inspiration with the new releases.

All Paperbabe goodies can be purchased here - the new releases are available from tomorrow, 24th September.

See you soon!
Katy x

Friday 2 September 2016

That's Crafty All Square Challenge


Time for another That's Crafty! Challenge and the theme this time is All Square. I've made a quick square card with a square stencil and a twinchie embellishment.

1 On a 4" square card blank, stencil the squares with Mustard Seed Distress Ink. Add splatters of Bora Bora PaperArtsy paint with a splatter brush.

2 Run a painty finger around the edge to make a border. When dry add a doodled black border with pen.

3 Stamp the Dina Wakley stamp (All the Gals set) onto a scrap of monoprinted card. Edge with Bora Bora paint and add some details with white gel pen and a doodled border. Stamp and add the sentiment.

And that's it - quick and simple today. Have fun in the challenge and good luck!

Katy x